A good friend of mine, Stephanie, has two of the cutest little monsters ever. Luka is turning 4 this year, and she asked me if I would be able to sew the number 4 onto a shirt for him. I told her of course I could! She gave me all of the materials, including the shirt, fabric for the number, and a package of “Heat’n’Bond” (even though I told Beast that I already had Heat’n’Bond, silly girl). My plan is to use the Heat’n’Bond to adhere the 4 to the shirt and zigzag stitch around the edges for decoration – and try to explain the whole process to you!

Heat’n’Bond is one of several iron-on adhesives available on the market. If you follow the instructions, it’s a great way to permanently adhere a design or pattern onto another piece of fabric. It’s washable and sewable. There are several types or “weights” of adhesive that can be utilized depending on the types of fabric you’re working with. Stephie got Heat’n’Bond Lite, which is perfect for this project. The packaging/bolt (yes, you can buy it off of the bolt rather that in a package) will tell you for what type of project that specific weight is best. Be sure you read the packaging before purchasing because not all fusibles are adhesives. There are options that are meant to make fabric more sturdy, but it only adheres one direction and to one piece of fabric. Those are fusibles. Adhesives have the ability to stick on both sides.
I should mention that you don’t NEED an iron-on adhesive to do this type of project. It eliminates the need for working with pins. I don’t usually use an adhesive unless a project specifically tells me to do so. But using one allows for a nice smooth surface on which to work without having to worry about puckering on corners and edges (unless you’ve pinned the heck out of them).
The cotton shirt Steph got is a great medium for this project. The lightweight cotton patterned fabric is perfect, too. When choosing a pattern, keep in mind how the pattern will look on a smaller item. A large pattern on a small shirt will be a little funky because you don’t get the full effect of the pattern. The Chuggington fabric Steph bought has a large pattern on it, which makes it difficult to ensure an entire train is captured, unless using a very large number. Typically small patterns work best for this type of thing – in this instance, smaller trains would have been better. In order to utilize the present fabric, the number will be pretty big. Knowing Luka, he’ll be okay with it. :D
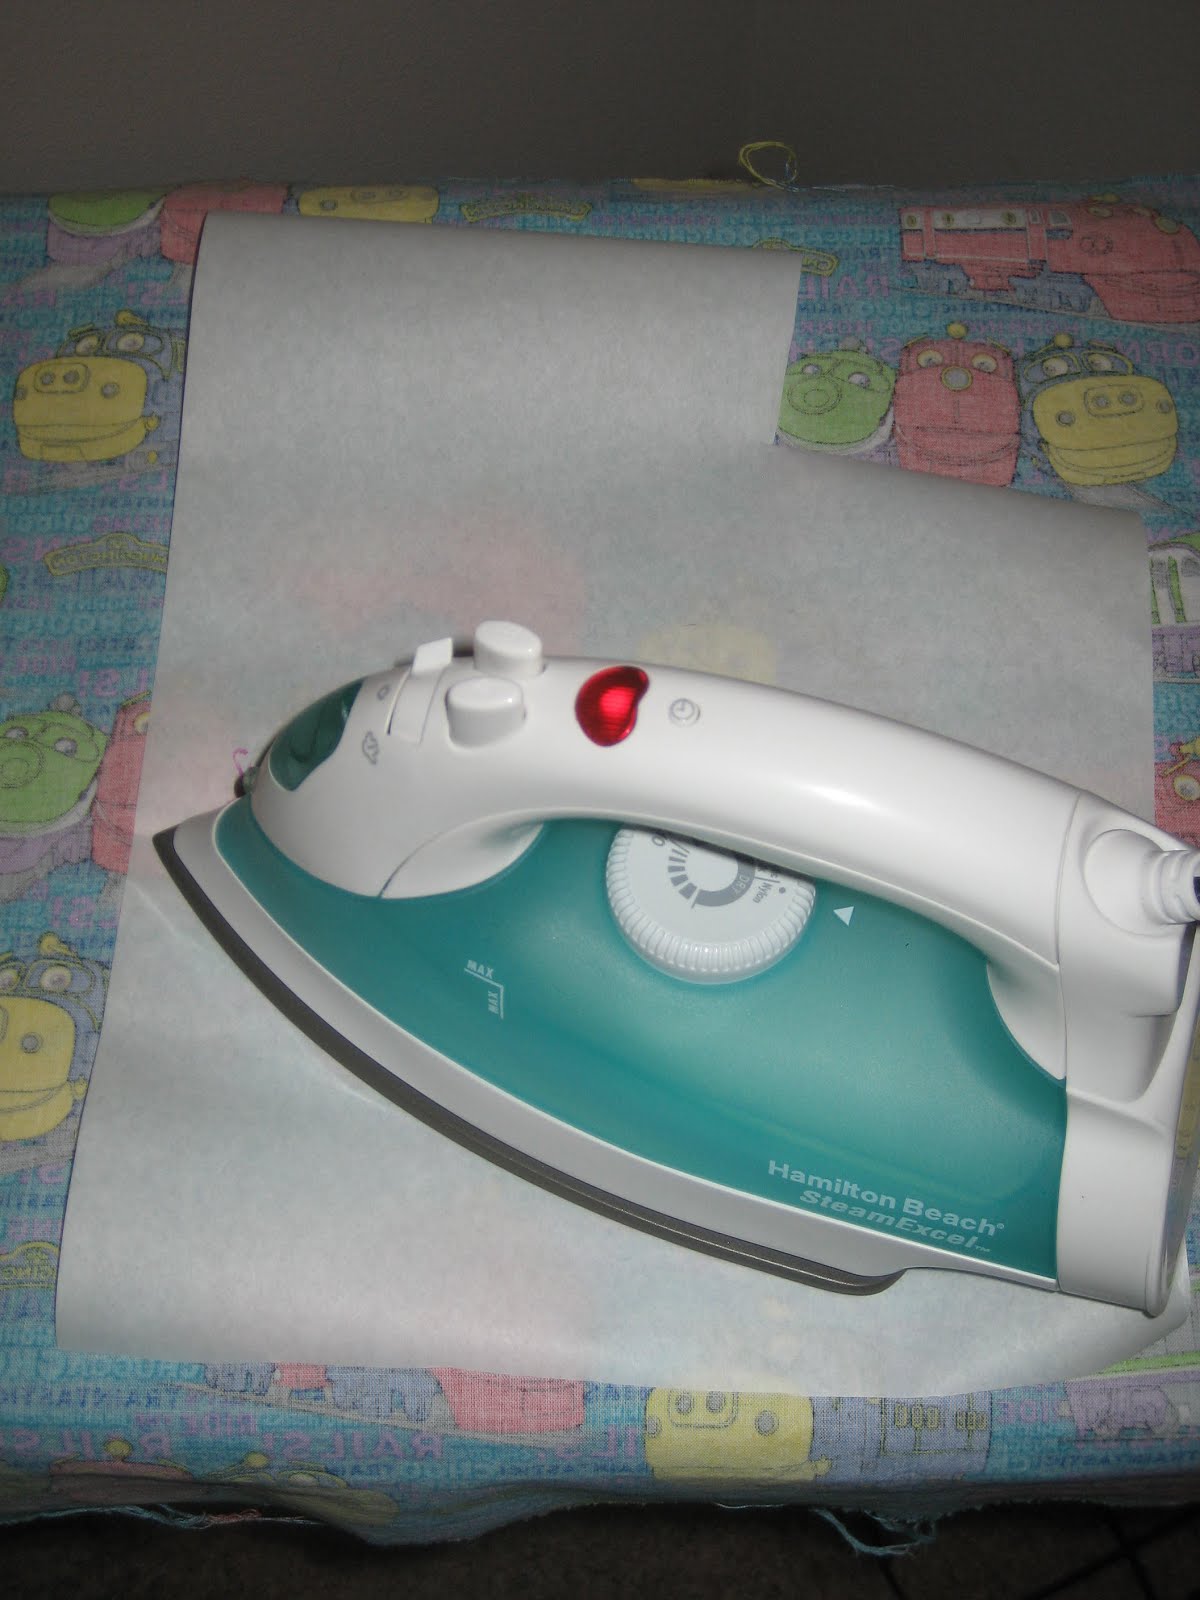
Before you start your project, be sure to wash, dry, and iron your shirt and fabric. Drying is the most important part of that whole process because it allows your materials to be pre-shrunk into similar conditions that the shirt will be exposed to on a regular washing basis. If you were to sew everything together before washing and drying, your decoration may shrink, causing puckering and tugging on the stitches and possibly breaking the bond created by the Heat’n’Bond. In other words, your decoration will fall off. The opposite can happen, too, where the decoration doesn’t change but the shirt does, leading to a beautiful decoration, but the shirt is puckered and stretched. It can distort the decoration or even make the garment fit weird.
I used my computer’s word processor to find a chunky font to print out a 4 to use as my pattern. As you can see, it took me a couple of attempts to find something I liked. Cut out your decoration so that it is solid, not a negative. Before cutting any fabric, lay your pattern on your shirt to be sure the proportions between the number and size of your shirt aren’t horrendous.

I cut my adhesive material into a manageable size to save fabric and adhesive. Once you iron this stuff onto your fabric it’s on there!

Follow the directions on your selected adhesive for the next part of the project. (Make sure that your ironing board is cool before laying down your fabric and adhesive. If the board is still hot from any previous ironing, it may prematurely start to bond the materials before you’re ready.) Heat’n’Bond has me placing the adhesive on the back of my material (not the patterned side) so that the fabric is face down on the ironing board and the adhesive is on top of it, paper liner facing up.

After I complete that first step, I like to trace my pattern onto the paper of the adhesive in order to cut out my shape. It’s easier to trace the pattern versus trying to pin a pattern through paper. Also, it doesn’t work to cut your decoration first and then apply your adhesive – you’ll end up adhering your Heat’n’Bond to the ironing board cover. Don’t forget that if your decoration is directional you need to flip your pattern so that it appears backwards to you, but once it’s cut out it will be correct.

(Sorry about the lighting in that one...)
Cut out your decoration with a nice pair of scissors made for cutting cloth. Any pair of scissors will do, but a nice pair of scissors not used on paper will stay sharper and give your cloth a clean edge.

Continue following instructions to adhere your decoration to your shirt. Again, be sure your decoration and ironing board are cool before starting this process so you don’t accidentally glue your decoration in the wrong place.

Now to sew! Pick out the thread(s) you wish to use for the zigzag stitching around the edges of the decoration. Matching colors will fade into the background, complimentary colors will pop. If you need to wind your bobbin (the little spool), do so by following the machine’s instructions. Prep your machine according to your machine’s instructions to thread the needle. Adjust the settings on your machine to create a zigzag stitch, making sure your machine is equipped with a zigzag presser foot and zigzag needle plate. Adjust your stitch selector to the zigzag stitch – on most machines it’s the primary setting – and following the instructions to set up your machine to create a zigzag stitch. On my machine, I adjusted the stitch length to nearly 0 so that the stitches are close together. My stitch width is set to a 3, dictating how wide my stitch will be. I recommend testing your stitch out on a scrap piece of fabric first to be sure you’re satisfied with what you’re going to create.


I removed the base of my machine for ease during sewing because the shirt is so small. Pick a starting point and begin! Don’t forget to backstitch at the start and end to prevent your thread from unraveling. Try to keep your thread centered on the edge so that you’re catching both the decoration and the shirt. Take it slow around corners and curves, and if you run out of thread on your bobbin in the middle of your project, don’t panic! Snip your top thread, rewind your bobbin, and start again just a little before your stopping point. It allows you to backstitch and prevent the ends of the thread from unraveling.


When you’re finished, snip your threads and admire your handiwork!


I hope Luka and Stephanie enjoy the shirt! It was a fun little project to work on today while recuperating from a couple of busy days at work. I have learned that my 7 month preggo belly does not allow me to get as close to my sewing desk as I’d like. I also need to get my machine looked at! For some reason it’s dropping stitches/not picking up the bottom thread. I may need to play with the tension of the upper thread a bit, but of course I discover this while trying to blog and create something for a friend!
My machine was originally my mom’s and it’s been around for as long as I can remember. I learned to sew on this machine before my mom and dad got me my own little machine. When my mom got her new fancy digital machine, I got the Kenmore! My little machine is okay, but it doesn’t have the same horsepower or capabilities as the Kenmore. I’m trying to find an origination date, but I’m not having any luck. Neither the manual nor the machine has a date, but there’s a sweet vintage photo on the cover of the manual with a little girl’s bottom hanging out of her dress. From what I can discern through Google, it was most likely built in the mid-to-late 1970’s.

I hope this inspires you to create something fun! As always, ask if you have any questions or leave any other tips! And thanks for stopping by. :D
<3 Sarah

Heat’n’Bond is one of several iron-on adhesives available on the market. If you follow the instructions, it’s a great way to permanently adhere a design or pattern onto another piece of fabric. It’s washable and sewable. There are several types or “weights” of adhesive that can be utilized depending on the types of fabric you’re working with. Stephie got Heat’n’Bond Lite, which is perfect for this project. The packaging/bolt (yes, you can buy it off of the bolt rather that in a package) will tell you for what type of project that specific weight is best. Be sure you read the packaging before purchasing because not all fusibles are adhesives. There are options that are meant to make fabric more sturdy, but it only adheres one direction and to one piece of fabric. Those are fusibles. Adhesives have the ability to stick on both sides.
I should mention that you don’t NEED an iron-on adhesive to do this type of project. It eliminates the need for working with pins. I don’t usually use an adhesive unless a project specifically tells me to do so. But using one allows for a nice smooth surface on which to work without having to worry about puckering on corners and edges (unless you’ve pinned the heck out of them).
The cotton shirt Steph got is a great medium for this project. The lightweight cotton patterned fabric is perfect, too. When choosing a pattern, keep in mind how the pattern will look on a smaller item. A large pattern on a small shirt will be a little funky because you don’t get the full effect of the pattern. The Chuggington fabric Steph bought has a large pattern on it, which makes it difficult to ensure an entire train is captured, unless using a very large number. Typically small patterns work best for this type of thing – in this instance, smaller trains would have been better. In order to utilize the present fabric, the number will be pretty big. Knowing Luka, he’ll be okay with it. :D
Before you start your project, be sure to wash, dry, and iron your shirt and fabric. Drying is the most important part of that whole process because it allows your materials to be pre-shrunk into similar conditions that the shirt will be exposed to on a regular washing basis. If you were to sew everything together before washing and drying, your decoration may shrink, causing puckering and tugging on the stitches and possibly breaking the bond created by the Heat’n’Bond. In other words, your decoration will fall off. The opposite can happen, too, where the decoration doesn’t change but the shirt does, leading to a beautiful decoration, but the shirt is puckered and stretched. It can distort the decoration or even make the garment fit weird.
I used my computer’s word processor to find a chunky font to print out a 4 to use as my pattern. As you can see, it took me a couple of attempts to find something I liked. Cut out your decoration so that it is solid, not a negative. Before cutting any fabric, lay your pattern on your shirt to be sure the proportions between the number and size of your shirt aren’t horrendous.

I cut my adhesive material into a manageable size to save fabric and adhesive. Once you iron this stuff onto your fabric it’s on there!

Follow the directions on your selected adhesive for the next part of the project. (Make sure that your ironing board is cool before laying down your fabric and adhesive. If the board is still hot from any previous ironing, it may prematurely start to bond the materials before you’re ready.) Heat’n’Bond has me placing the adhesive on the back of my material (not the patterned side) so that the fabric is face down on the ironing board and the adhesive is on top of it, paper liner facing up.
After I complete that first step, I like to trace my pattern onto the paper of the adhesive in order to cut out my shape. It’s easier to trace the pattern versus trying to pin a pattern through paper. Also, it doesn’t work to cut your decoration first and then apply your adhesive – you’ll end up adhering your Heat’n’Bond to the ironing board cover. Don’t forget that if your decoration is directional you need to flip your pattern so that it appears backwards to you, but once it’s cut out it will be correct.

Cut out your decoration with a nice pair of scissors made for cutting cloth. Any pair of scissors will do, but a nice pair of scissors not used on paper will stay sharper and give your cloth a clean edge.

Continue following instructions to adhere your decoration to your shirt. Again, be sure your decoration and ironing board are cool before starting this process so you don’t accidentally glue your decoration in the wrong place.

Now to sew! Pick out the thread(s) you wish to use for the zigzag stitching around the edges of the decoration. Matching colors will fade into the background, complimentary colors will pop. If you need to wind your bobbin (the little spool), do so by following the machine’s instructions. Prep your machine according to your machine’s instructions to thread the needle. Adjust the settings on your machine to create a zigzag stitch, making sure your machine is equipped with a zigzag presser foot and zigzag needle plate. Adjust your stitch selector to the zigzag stitch – on most machines it’s the primary setting – and following the instructions to set up your machine to create a zigzag stitch. On my machine, I adjusted the stitch length to nearly 0 so that the stitches are close together. My stitch width is set to a 3, dictating how wide my stitch will be. I recommend testing your stitch out on a scrap piece of fabric first to be sure you’re satisfied with what you’re going to create.


I removed the base of my machine for ease during sewing because the shirt is so small. Pick a starting point and begin! Don’t forget to backstitch at the start and end to prevent your thread from unraveling. Try to keep your thread centered on the edge so that you’re catching both the decoration and the shirt. Take it slow around corners and curves, and if you run out of thread on your bobbin in the middle of your project, don’t panic! Snip your top thread, rewind your bobbin, and start again just a little before your stopping point. It allows you to backstitch and prevent the ends of the thread from unraveling.


When you’re finished, snip your threads and admire your handiwork!


I hope Luka and Stephanie enjoy the shirt! It was a fun little project to work on today while recuperating from a couple of busy days at work. I have learned that my 7 month preggo belly does not allow me to get as close to my sewing desk as I’d like. I also need to get my machine looked at! For some reason it’s dropping stitches/not picking up the bottom thread. I may need to play with the tension of the upper thread a bit, but of course I discover this while trying to blog and create something for a friend!
My machine was originally my mom’s and it’s been around for as long as I can remember. I learned to sew on this machine before my mom and dad got me my own little machine. When my mom got her new fancy digital machine, I got the Kenmore! My little machine is okay, but it doesn’t have the same horsepower or capabilities as the Kenmore. I’m trying to find an origination date, but I’m not having any luck. Neither the manual nor the machine has a date, but there’s a sweet vintage photo on the cover of the manual with a little girl’s bottom hanging out of her dress. From what I can discern through Google, it was most likely built in the mid-to-late 1970’s.

I hope this inspires you to create something fun! As always, ask if you have any questions or leave any other tips! And thanks for stopping by. :D
<3 Sarah
Thanks Sarah! If I knew how to sew, this would be very helpful! If I knew how to sew, there wouldn't be a post! ;o) It looks awesome! Luka will love it!
ReplyDelete